

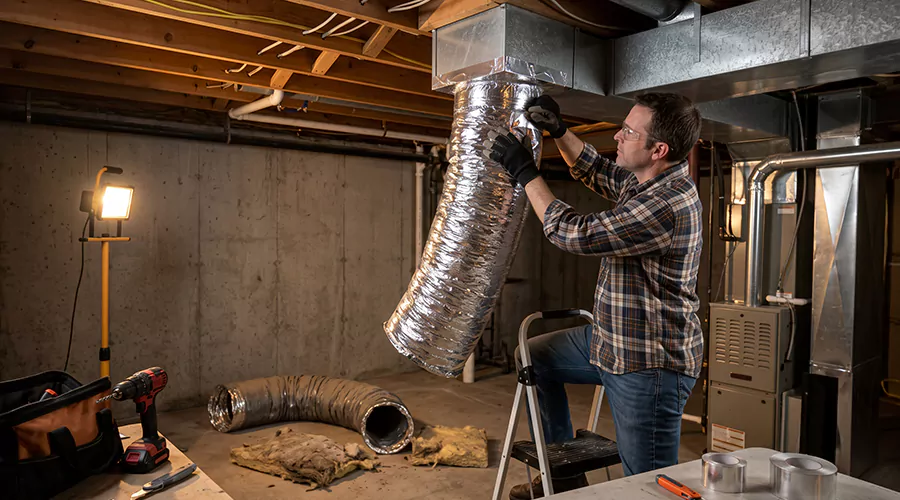
Replacing old ductwork involves inspecting the existing HVAC air distribution system, identifying sections that cannot be repaired, designing correctly sized replacements, and installing new ducts with proper sealing, insulation, and support. The system should then be tested for leakage and airflow. Older homes may also require additional preparation because concealed ducts, outdated return pathways, and potentially hazardous insulation can complicate removal.
Air ducts distribute heated and cooled air throughout a house. Over time, the materials can become damaged by moisture or physical contact, while joints may separate and allow conditioned air to escape. Some older installations also contain undersized branches or return passages that restrict airflow.
However, old ductwork does not automatically need replacement. A sound sheet metal duct may remain suitable for many years, while a newer flexible duct can fail early if it was crushed during installation. The decision should depend on the material's condition and whether the system meets the home's airflow needs.
Replacing outdated ductwork creates an opportunity to correct air leaks and poor routing. It can also improve access to existing HVAC components and reduce problems associated with deteriorated insulation. The replacement should follow a design rather than simply reproduce every dimension and connection from the old installation.
How Do You Know When Old Ductwork Needs Replacement?
Old ductwork should be replaced when deterioration or incorrect construction prevents reliable operation. Extensive corrosion and collapsed flexible sections are common examples. Wet or mold-contaminated fiberglass duct materials may also need replacement because cleaning cannot reliably restore them.
Other problems may be repairable without removing entire ducts. A loose metal joint can often be mechanically secured and sealed. Minor insulation damage may also be corrected when the underlying air passage remains sound.
The strongest reason for replacement is documented structural damage or an airflow problem that cannot be corrected through a reasonable repair. Age alone is not sufficient evidence.
Signs of Deteriorating Ductwork
Several warning signs deserve inspection before a replacement project begins. Some are visible in an attic or basement, while others appear as recurring comfort problems. The symptoms should be evaluated together rather than treated as proof that every duct is failing.
- Metal ducts have extensive rust or perforations.
- Flexible ducts are permanently crushed or torn.
- Joints repeatedly separate despite proper repairs.
- Insulation is wet or deteriorating.
- Confirmed mold affects porous duct materials.
- Several branches have inadequate support.
- Conditioned air escapes through substantial openings.
- The existing return system draws air from unintended building cavities.
- Some rooms receive consistently inadequate airflow.
- The duct system is incorrectly sized for the HVAC equipment.
- Extensive damage affects multiple trunks and branches.
- Repairs have become impractical because the surrounding material is no longer sound.
High utility bills and uneven temperatures can indicate duct problems, but they can also result from equipment defects or poor building insulation. A qualified inspection should establish the cause before the homeowner approves replacement.
How Long Does Old Ductwork Last?
There is no universal expiration age for residential ductwork. Some consumer cost guides describe an average service life of roughly 10 to 20 years, but that range should not be treated as a mandatory replacement schedule. Properly installed sheet metal can remain serviceable for longer, while poorly installed flexible ducts may deteriorate sooner.
Installation quality has a major effect on longevity. Ducts supported correctly and protected from moisture can remain in good condition for many years. Materials exposed to roof leaks, standing water, or repeated physical damage can fail more quickly.
The duct's performance should also be considered. A system may remain structurally intact but be poorly sized for replacement HVAC equipment. In that case, a design change may be appropriate even though the old material has not deteriorated.
Rather than replacing ducts solely because of their age, homeowners should request an assessment of their structural condition, leakage, insulation, and airflow capacity.
Should You Repair Old Ductwork or Replace It?
Our air duct repair service is generally more economical when the existing material remains strong enough for a durable correction. A properly secured metal fitting can often be sealed without replacing the connected trunk. A damaged section that has lost its shape or structural strength may require replacement.
| Existing Duct Condition | Typical Recommendation |
|---|---|
| Minor leak at a sound metal seam | Repair and seal |
| Loose connection with intact duct material | Reattach and seal |
| Damaged insulation around a sound duct | Repair or replace insulation |
| Small localized hole in sound metal | Evaluate suitable patch |
| Extensive rust and multiple perforations | Replace affected section |
| Severely crushed flexible liner | Replace affected run |
| Wet or moldy fiberglass duct material | Replace affected material |
| Incorrectly sized ductwork | Redesign and replace as needed |
| Leaky framing-cavity return | Evaluate conversion to a sealed ducted return |
| Widespread structural deterioration | Consider broader replacement |
A contractor should document which sections can remain in service. Replacing every duct is not necessarily beneficial when most of the network is sound. A targeted project may correct the problem with less disruption and lower cost.
However, repeated patching can become impractical when multiple sections continue failing. In that situation, broader replacement may offer a more durable solution.
What Should You Check Before Removing Old Ductwork?
Older homes require careful preparation because the materials and construction methods may differ from current installations. Some ducts pass through narrow framing spaces or connect to return passages that are not fully enclosed. The contractor should inspect the entire arrangement before cutting or disconnecting material.
Asbestos-Containing Insulation
Some older heating systems contain insulation or wrapping that may include asbestos. The material cannot be reliably identified by its appearance alone. Cutting, scraping, or removing it improperly can release hazardous fibers.
The Environmental Protection Agency recommends leaving suspected asbestos-containing materials undisturbed until they can be evaluated by a trained and accredited professional. When removal is necessary, appropriate specialized procedures should be used. Ordinary duct replacement personnel should not disturb suspected hazardous insulation.
The assessment should occur before demolition begins. Discovering the problem after duct material has been cut can create avoidable exposure and project delays.
Old Return Air Cavities
Some older houses use framed wall or floor spaces as return air pathways. These arrangements may be difficult to seal because air can enter through construction joints and gaps. They can also draw particles from surrounding building cavities.
The Department of Energy's Building America guidance recommends properly ducted returns rather than relying on building cavities alone. During replacement, the contractor should evaluate whether existing cavity returns can be converted to dedicated sealed ducts. Applicable local codes and the home's construction determine the appropriate correction.
The work may require new return boxes or changes to the routing. The return system should be designed to provide suitable airflow to the equipment.
Existing Electrical and Plumbing Systems
Old ductwork may be installed close to wiring, water pipes, or other utilities. These components can restrict removal and create hazards when tools are used in concealed spaces. The contractor should identify nearby utilities before opening ceilings or walls.
Structural framing also needs protection. Joists and beams should not be cut to make room for replacement ducts without an approved structural design. A custom duct transition may be necessary where the building layout limits available space.
Moisture and Pest Damage
Roof leaks and other water sources can damage ducts and surrounding insulation. Pest activity may also affect flexible liners or leave contaminated material behind. These problems should be addressed before new ducts are installed.
A replacement duct placed into the same wet or pest-damaged environment can deteriorate again. The project plan may therefore require plumbing, roofing, or pest-control work before the HVAC installation. Correcting the cause helps protect the new materials.
Current HVAC Equipment Requirements
An older duct system may have been designed for equipment with different airflow characteristics. A replacement furnace or air conditioner can require changes to supply and return capacity. The contractor should determine whether the existing design remains appropriate.
Simply copying old duct dimensions may preserve restrictions that already affect comfort. A properly developed replacement design should account for the equipment and the rooms it serves.
What Materials Are Best for Replacing Old Ductwork?
Modern HVAC duct systems use several materials, including rigid sheet metal and insulated flexible ducts. The correct choice depends on airflow requirements and the physical location of each section. Some homes benefit from combining rigid trunks with suitable flexible branches.
| Duct Material | Common Application | Main Consideration |
|---|---|---|
| Galvanized sheet metal | Main supply and return trunks | Durable and rigid, requires sealed joints |
| Insulated flexible duct | Suitable branch connections | Needs gentle bends and adequate support |
| Fiberglass duct board | Approved plenums and duct sections | Must remain protected from moisture |
| Other approved rigid duct products | Special routing or space limitations | Must meet code and manufacturer instructions |
Sheet metal is often appropriate for main trunks because it maintains its shape and can be fabricated into different sizes. Flexible ductwork may simplify certain branch routes, but it becomes restrictive when compressed or excessively sagging. Neither material should be selected solely because it has the lowest purchase price.
Insulation requirements also vary with the installation location. Ducts outside conditioned space generally require suitable insulation under applicable energy codes. The contractor should confirm that the replacement material and insulation system meet the local requirements.
How to Replace Old Ductwork Step by Step?
Replacing old ductwork should begin with a complete assessment and finish with testing. The process below explains how professional installers approach a residential replacement project. Homeowners should not dismantle concealed ducts or potentially hazardous insulation without the required qualifications and precautions.
Step 1. Inspect the Complete Existing System
Begin by identifying the furnace or air handler and tracing the supply and return duct network. Examine accessible sections for rust, collapse, leaks, and moisture damage. Record where branches connect to main trunks and room registers.
Photographs can help document the condition before work begins. A contractor should identify which sections are defective and which can remain. This is particularly helpful when most of the ductwork is concealed from the homeowner.
The inspection should also evaluate existing duct insulation and supports. A structurally sound passage with a damaged exterior insulation layer may not need complete replacement.
Step 2. Identify Hazards Before Disturbing Materials
Inspect older duct wrapping and nearby building materials for conditions requiring specialized assessment. Suspected asbestos-containing material should not be cut or removed during ordinary replacement. Appropriate professionals should determine how the material can be handled.
The contractor should also check for exposed wiring, damaged electrical components, and water intrusion. Unsafe conditions must be corrected or controlled before removal. In older buildings, access through finished surfaces may introduce additional material concerns.
Planning these precautions before demolition helps prevent unnecessary project delays and exposure.
Step 3. Evaluate Existing Heating and Cooling Performance
Before replacing the ducts, identify the complaints the project is intended to correct. These may involve low airflow, uneven temperatures, excessive noise, or visible leakage. A contractor should investigate whether the ductwork is responsible.
Static pressure and airflow measurements can help identify restrictions. Duct leakage testing may also demonstrate how much air is escaping through connections. These measurements provide a baseline for evaluating the replacement system.
An equipment defect should not be mistaken for a duct problem. A dirty filter or malfunctioning blower can affect airflow even when the ducts remain sound.
Step 4. Calculate the Replacement Duct Sizes
Determine the airflow needed by the individual rooms and the HVAC equipment. ACCA Manual D provides recognized principles for residential duct sizing and pressure-loss calculations. The design should consider duct length, material, fittings, and available blower capacity.
A system that originally contained undersized branches may need larger ducts or alternative routing. Return capacity should also be evaluated because the blower must receive enough air to support the supply network. Enlarging only the supply ducts may not solve a return-side restriction.
The contractor should prepare a design that meets the home's actual needs rather than automatically reproducing the old arrangement.
Step 5. Plan the New Layout
Develop a replacement route that limits unnecessary bends and excessive duct length. The layout should identify main trunks, branch takeoffs, register connections, and return pathways. Existing building framing and utility locations must also be considered.
In older homes, a different route may avoid cramped wall cavities or repeated sharp transitions. However, moving ducts can require new openings or surface restoration. The homeowner should understand these changes before installation begins.
A clear layout helps the installers work consistently and provides a useful reference for future maintenance.
Step 6. Check Permits and Local Requirements
Local mechanical and energy codes may require permits or inspections for substantial duct replacement. The contractor should verify which requirements apply. These can include duct insulation ratings, connection methods, leakage limits, and fire-safety provisions.
A replacement project may also affect fire-rated walls or floors. Penetrations through these assemblies must be restored using suitable approved methods. The duct installation should not compromise required building separations.
The estimate should identify permit fees and inspections when applicable. A contractor should not assume that existing work is compliant simply because it has been in place for many years.
Step 7. Shut Down and Protect the HVAC Equipment
Turn off the affected heating and cooling system before duct sections are opened. Qualified personnel should follow appropriate energy isolation procedures when working near equipment cabinets or electrical connections. The blower should not operate while major portions of the duct network are disconnected.
Protect the furnace or air handler from loose construction debris during removal. Old insulation and dust should not be allowed to enter sensitive components. The technician may need suitable temporary barriers depending on the work.
Fuel-burning furnace exhaust systems require separate treatment. A combustion flue is not a supply or return air duct and must not be modified using ordinary duct installation methods.
Step 8. Remove the Damaged Duct Sections
Carefully disconnect the old ducts from their fittings and supports. Remove damaged material while preserving sound trunks, register boots, and other components intended for reuse. Larger metal sections may require staged removal to prevent uncontrolled movement.
Debris should be collected appropriately. If contamination or hazardous materials are present, the removal procedure must reflect those conditions. Old ductwork should not be torn apart indiscriminately because surrounding insulation and building materials may be affected.
After removal, inspect the exposed openings and fittings. Damaged collars or unstable boxes should be corrected before installing new ducts.
Step 9. Prepare New Trunks and Branch Connections
Install or repair the main duct connection points according to the approved design. The fitting sizes should match the new duct dimensions. Sharp transitions that create unnecessary resistance should be avoided where practical.
A rigid trunk should be supported independently and mechanically secured. New branch takeoffs need suitable attachment and sealing. The contractor should confirm that the main duct layout is correct before adding all the branches.
This stage is also an opportunity to correct old return pathways that draw air from unintended building cavities. The replacement should provide appropriately sealed connections to the HVAC equipment.
Step 10. Install New Ductwork
Position the new ducts along the approved routes and secure them using installation methods suited to the material. Sheet metal requires appropriate hangers and fastened joints. Flexible ductwork must remain extended and supported without excessive compression.
The Department of Energy recommends avoiding sharp bends and long loops in flexible ducts because they increase airflow resistance. Where a tight turn cannot be avoided, a suitable rigid fitting may provide a better path. The installation should maintain the designed duct size throughout each run.
Connections should not be forced to fit damaged or undersized collars. Fittings should be corrected when their dimensions do not match the design.
Step 11. Seal Duct Joints and Connections
Secure the duct components mechanically before applying suitable sealing products. HVAC mastic and listed metal-backed closure materials are commonly used for appropriate applications. Ordinary cloth-backed duct tape is not a durable permanent sealing solution.
Supply and return connections should both be sealed. Supply leaks release conditioned air before it reaches the rooms, while return leaks can draw unwanted air from unfinished spaces. Both conditions can affect performance.
A connection may look closed from the outside while still leaking internally. The contractor should inspect joints before covering them with insulation or building finishes.
Step 12. Install Insulation and Vapor Protection
Ducts located outside conditioned space require insulation according to applicable local codes. The insulation must cover the duct and relevant connections without significant gaps or compression. An exterior vapor barrier may also be needed to reduce condensation risks.
Pre-insulated flexible ducts contain a protective outer jacket that should be restored around fittings. Rigid metal ducts may require separate insulation after air sealing is complete. The contractor should identify the specified insulation rating.
The replacement should address the home's actual thermal boundary. A duct in a conditioned basement may have different requirements from one installed in a vented attic.
Step 13. Inspect Register Boots and Return Grilles
Check the connections between new branches and existing register boots. The boots should remain securely supported and sealed where they meet surrounding building materials. A loose boot can create leakage or noise even when the connected duct is new.
Return grilles should provide suitable open area for the system's airflow needs. If the previous system used restrictive return openings, replacing the duct alone may not be enough. The contractor should evaluate the complete return path.
Any new grille locations should be approved as part of the design. Simply adding openings without calculating airflow can create additional balancing problems.
Step 14. Test for Air Leakage
A qualified contractor should evaluate the completed duct system for air leakage. A duct pressurization test can identify openings that are difficult to see. Applicable code or program requirements determine the accepted test procedure and leakage limits.
Leaks should be corrected while the connections are still accessible. Once ceilings or walls are closed, repairs may require additional work. Testing provides evidence that the installation was completed properly.
The contractor should provide results when testing is included in the project. A new duct network should not be assumed airtight merely because all the connections have been covered.
Step 15. Verify Airflow and System Pressure
Restart the heating and cooling system after the duct network and equipment have been fully restored. The technician should check airflow at the supply registers and evaluate the system's static pressure where appropriate. These measurements help identify restrictions or balancing problems.
Room airflow does not need to be identical at every register because different rooms have different heating and cooling loads. The system should deliver the quantities established by the design. Adjustments may be necessary after major duct replacement.
In homes with naturally vented fuel-burning appliances, changes to duct leakage and building pressure may warrant appropriate combustion safety verification. The HVAC contractor should account for these concerns during the final checks.
Step 16. Restore Building Finishes and Document the Work
Any ceilings, walls, or access panels opened for duct installation should be restored according to the project agreement. Required fire-rated assemblies must also be returned to their intended condition. Removed insulation should be replaced where appropriate.
The contractor should document which ducts were replaced and which existing sections remain. A final layout, photographs, and testing results can help future technicians understand the system. Warranties and material specifications should also be retained.
The project is complete when the ducts are correctly installed and the HVAC system operates as intended, not merely when the last duct section has been connected.
What Is Different About Replacing Ductwork in an Older Home?
Older homes can contain duct layouts that were designed for different equipment or building standards. Return pathways may use framing cavities, and some duct insulation may need hazardous-material assessment. Access can also be difficult because finished surfaces conceal most of the network.
A replacement project may therefore involve more design and preparation than installing ducts in a new building. The contractor should determine whether existing register locations are suitable. The work may require new return connections or a different route to avoid restrictive framing spaces.
Preserving the building is also important. Cutting structural members or removing historic finishes without a plan can create additional damage. A contractor experienced with older properties can coordinate HVAC work with necessary building repairs.
The homeowner should distinguish replacement that preserves a suitable design from a more extensive retrofit. The latter may involve larger ducts and additional construction costs but can correct problems that an identical replacement would leave unresolved.
How Much Does It Cost to Replace Old Ductwork?
Published U.S. residential replacement estimates commonly range from $1,400 to $5,600 for larger projects. HomeGuide also reports approximately $25 to $55 per linear foot for removing and replacing ductwork. Angi's 2026 project data shows a lower average of approximately $1,250, reflecting a different mix of project sizes and scopes.
The cost depends on how much ductwork is actually replaced. A localized project involving one damaged branch may be relatively inexpensive. Rebuilding a concealed supply and return network in a finished older house can cost substantially more.
| Replacement Scope | Indicative U.S. Cost |
|---|---|
| One straightforward duct run | $270–$500 |
| General ductwork replacement | $25–$55 per linear foot under one pricing model |
| Typical larger residential replacement projects | $1,400–$5,600 |
| Extensive custom replacement in an older home | Site-specific estimate |
| Additional design work | $200–$600 in some published estimates |
| Additional finishing and hazardous-material work | Separate scope and quote |
These figures should not be combined automatically. A contractor's project quote may already include design work, while another may charge separately for it. Hazardous-material assessment and related building repairs should be evaluated according to the conditions actually present.
A written estimate should identify demolition, new materials, connection sealing, insulation, and testing. This allows homeowners to compare offers that cover the same work.
Can You Replace Old Metal Ducts With Flexible Ductwork?
Some rigid metal branches can be replaced with suitable flexible ductwork when the design and installation conditions permit it. However, flexible material is not automatically an equivalent replacement for every metal trunk. Its airflow resistance and need for proper support must be considered.
A rigid metal main duct may provide a more suitable passage where the system carries a substantial amount of air. Flexible branches can be useful for connecting suitable takeoffs to room registers. The contractor should determine which material is appropriate for each part of the network.
Replacing metal with flexible duct should not involve compressing the liner into a narrow cavity. An unsuitable flexible route can create more resistance than the old metal passage. Proper sizing and installation remain necessary regardless of the material selected.
Can You Replace Ductwork Without Replacing the Furnace or AC?
Yes. Existing heating and cooling equipment can often remain in service while damaged ducts are replaced. The new air distribution network must be compatible with the equipment's airflow requirements. The contractor should evaluate the blower and connections before changing the duct design.
A new HVAC system is also not an automatic reason to discard sound ducts. However, when equipment capacity or airflow characteristics change, existing ducts may need resizing or reconfiguration. The decision should follow calculations and inspection.
Coordinating equipment and duct replacement can reduce duplicated labor when both are genuinely needed. It should not become a reason to replace usable components unnecessarily.
How Long Does Old Ductwork Replacement Take?
A straightforward replacement of several accessible duct sections may take one or two working days. An extensive project involving finished walls and ceilings can take longer, particularly when custom metal fabrication or hazardous-material work is required. The full schedule may include restoration after the HVAC installation is complete.
Design and permits can also affect timing. Contractors may need to prepare duct calculations and obtain approvals before demolition begins. Older properties can reveal concealed damage that requires additional coordination.
The contractor should identify when heating or cooling will be unavailable. Final leakage and airflow testing should remain part of the schedule. A project should not be rushed at the expense of proper connections or system performance.
Is Replacing Old Ductwork Worth the Cost?
Replacement can be worthwhile when the existing system is extensively damaged or incorrectly designed. Restoring collapsed ducts and correcting major air leaks may improve comfort and reduce unnecessary energy loss. The benefit depends on the original defects and the quality of the new installation.
ENERGY STAR estimates that typical homes can lose approximately 20% to 30% of air moving through their ducts because of leaks and poor connections. However, these figures do not promise equivalent savings on utility bills after replacement. A home with only minor duct leakage may experience a smaller improvement.
Repairing sound ducts may provide similar benefits at lower cost. Sealing accessible joints and correcting support problems should be considered before replacing an entire network. The most useful investment addresses the actual defects.
What Mistakes Should You Avoid When Replacing Old Ductwork?
Older-home replacements can introduce problems when the contractor copies an inadequate existing layout or overlooks hazardous materials. The installation should also preserve building structure and properly account for supply and return airflow.
Avoid these mistakes:
- Replacing every duct solely because of its age.
- Failing to document which sections are damaged.
- Disturbing suspected asbestos-containing insulation.
- Reusing duct sizes that are known to be inadequate.
- Ignoring return-air capacity and pressure balancing.
- Connecting new ducts to poorly sealed framing cavities.
- Installing excessive flexible duct length.
- Creating sharp bends or compressed sections.
- Leaving duct connections mechanically unsecured.
- Using ordinary cloth-backed tape for permanent sealing.
- Omitting insulation where required.
- Failing to restore fire-rated building assemblies.
- Modifying structural framing without proper approval.
- Ignoring combustion appliance safety after major pressure changes.
- Skipping duct leakage and airflow testing.
The replacement should leave the home with a sound air distribution system rather than simply newer material. A properly designed and tested installation is more valuable than one that repeats the limitations of the original system.
What Should You Ask an HVAC Contractor Before Replacing Old Ducts?
A contractor should be able to identify the reason for replacement and explain the proposed new layout. Photographs and measurements are useful when the ducts are hidden from view. The quote should distinguish necessary repairs from optional design improvements.
Ask the following:
- Which existing ducts are unsuitable for continued use?
- Can any sections be repaired instead of replaced?
- Will the supply and return networks both be evaluated?
- How will the new duct sizes be calculated?
- Are existing framing-cavity returns being corrected?
- Has older insulation been evaluated before disturbance?
- Which duct materials and insulation ratings will be used?
- Are demolition and waste removal included?
- Will the new connections be mechanically secured and sealed?
- Are permits and final inspections included?
- Will the completed ducts be tested for leakage?
- How will room airflow be verified?
These questions help determine whether the contractor is replacing material or correcting the full problem. A low-cost quote may exclude required design or restoration work. Comparing detailed proposals is more useful than choosing solely by the final price.
How Can You Maintain New Ductwork After Replacement?
Proper maintenance begins with keeping the duct network protected from physical and moisture damage. Ducts in attics and crawlspaces should remain adequately supported. Stored items and later construction work should not crush flexible branches or disturb connections.
Check HVAC filters according to the equipment manufacturer's instructions. A suitable filter helps reduce particles entering downstream components. Damaged return connections should be repaired promptly because they can draw dust from unfinished spaces.
During routine HVAC service, ask the technician to inspect accessible duct supports and fittings. Water stains or deteriorating insulation should also be investigated. Early repairs can prevent minor damage from affecting larger portions of the system.
Conclusion
Replacing old ductwork should begin with an inspection of material condition and airflow performance, not an assumption that age requires replacement. Damaged sections can be removed while sound ducts remain in service when appropriate. The new system should be properly sized, sealed, insulated, and supported. Older homes may require additional precautions for insulation materials and outdated return pathways. Before approving replacement, request a design-based proposal and plan for leakage and airflow testing after installation.